Category Archives: Notes

Everyone is a UX Designer

What is a UX Designer? What is their role, and what about all those unintelligible code-names such as UXD, UCD, IxD, IA, HCI? To the general public, it’s all linguistic mud. I’ve heard the baffling exclamations before:

I don’t know what that is, but it sounds fancy.

The title of UX Designer hadn’t entered much of a collective vocabulary until about 2008. It has grown up since those 5 years. Aaron Weyenberg mentions the use of “User Experience” as a design term dates back to at least 1995, where Don Norman relates it to “human interface research and application.”

It’s not just the designer

From a literal perspective, “User Experience” design implies that the designer is driving like a chauffeur, and the user is a passive passenger receiving empirical stimuli and commanded to do and feel as prescribed. But experience is subject to variables outside a designer’s control. We can only design so far, then set a design free to be experienced (with the chance of a user taking an unexpected detour).

The users are actually the drivers. The experience is bound to the user. You, the designer, can supply a comfortable and efficient car. You can pave the roads, choose how big you want the signs, or decide not to have any signs. The characteristics of each available element you make or contribute to can and should promote specific expectations and actions, and make drivers aware of possibilities and goals.

Users design their own experience because of their actions (and reactions) with the tools and features you’ve shaped. They are not alone; hopefully you’ve supplied a good mental roadmap and framed a world that is helpful, pleasurable, and clear. That world (your design) should shows signs of being made well.

Experience is collaborative

Everyone is a user experience designer. This partnership between maker and receiver reflects the art coefficient that Marcel Duchamp eloquently stated from 1957’s The Creative Act. The same sentiments apply to design as they do art–The act doesn’t end with the artist finishing the work, but its the spectator that completes the act by perceiving it.

All in all, the creative act is not performed by the artist alone; the spectator brings the work in contact with the external world by deciphering and interpreting its inner qualifications and thus adds his contribution to the creative act. This becomes even more obvious when posterity gives a final verdict and sometimes rehabilitates forgotten artists.

–Marcel Duchamp

I’d go even further and say that for design, the entire working team is a contributor to an experience, with degrees of separation. Experience is a continuum that lives among surroundings, culture, and time.

Renaming UX

I jokingly present yet another naming standard for UX positions: Experience Counselor, one who advises the Product Drivers.

Is there a name that de-emphasizes a designer’s control, or have we permanently accepted the ambiguity and broad scope that UX design now encompasses? In that same reference from 1995, Don Norman describes a User Experience Architect, which seems a more linguistically justifiable job title than UX Designer. It implies setting a foundation and making a space that supports its community. But architect is still a bit loaded in that it’s not traditional architecture, and does not connote the field the way “Designer” does.

And what about users? The word user is a cold sounding term that could easily be a robot. When I think of a user, the first thing I think of is a drug addict. Besides, couldn’t I observe someone else doing the “using,” yet still experience something?

It’s still design

Although misused, I don’t think UX design is necessarily a bad term, as people can understand the broad, but intended meaning. My best attempt at refining the title is to drop “user” because it’s already implied. Then I make experience an adjective… Experiential design: Design that guides and sustains a desirable experience.

Get drafted on dribbble

There is a certain allure to the Dribbble community since it’s a small body of select designers who curate the entry of makers of quality work. Although there are plenty of candy-coated shots, plenty of top designers (and other makers) have work posted there. You can’t ever pay your way to post things, but recruiters and professionals can upgrade to a paid account to search and make lists, among other things (but not post work). Getting a dribbble invite might be impossible unless know what you’re doing and are diligent.

I got drafted by Jason Frost, a nice designer from Georgia with screen printing chops. And I was at the right place at the right time. Here are a few tips that led me to get drafted, and hopefully they’ll give the upcoming generation some ideas.

  1. Have an online portfolio. Of your best work. This should be obvious. If you don’t have the energy to make your own site, use behance, cargo collective, or whatever you can.
  2. Register. There is no shame in signing up as a prospect. It also gives people the chance to actually invite you anyway.
  3. Ask your immediate friends and peers if they’re dribbling and hoarding invitations.
  4. Be active in your community. This would include your digital network and your local organizations. Follow dribble pros you admire and have your portfolio linked in your profile. Also follow twitter profiles because many dribblers are tweeting.
  5. Do good things. Hold a door open for someone, and excel at your craft.
  6. Prepare. Have a few dribbble sized pieces (400×300, and @2x: 800×600) and show them off. It might be a longshot, but you could upload to sites where there are people who may be looking such as www.draft.im and dribbbledrills group on Flickr.
  7. Spam everyone you know on twitter at least thrice a day. Kidding. Don’t go overboard with #dribbble hashtaggers–they probably don’t have any invites and most are spammers anyways. But you can be smart about searching. Scout people who are offering invites and be sincere when replying. Nothing shows you don’t care like “yo @UXunicorn, #dribbl iz unfair u shuld #invite me” on the last 40 remarks about dribbble. When I tried, I used some thoughtful search operators to siphon out a lot of beggars and junk tweets. I even put the search results into an RSS feed in case I had free time to find kind designers who had invites lying around.

Keep trying, but don’t overdo it. It’s just a website. Work on your skills first. If you’re good, you have better chances of doing anything.

Tax Write-offs for Graphic Designers

As tax season draws nearer, I’ve collected an inventory of some relevant items I’ve purchased last year, pending expenses, and other ideas that are worth considering to maximize your legit expenses for taxes. Don’t forget to capture all your graphic design expenses that are tax deductible for the year. I missed one hefty business cost last year because it was on auto-pay and didn’t think to trace the receipt in my emails. Even if you aren’t a graphic designer, this list would probably work for any creative professional (artists, photographer, musician, copywriter, UX freelancers, etc). Continue reading

Can designers blame their tools?

Design (in all fields) extends beyond a designer in isolation from a context. By definition, it is the plan or execution of a goal with a specific intent. So, design is an instrument and a resolution for a given context.

You can’t hide behind your tools.

I heard that one back in design school, and I wholeheartedly agree with it. I grew to appreciate the value of thinking critically above memorizing every Adobe shortcut known to humankind. It’s the mind applied in tandem with the tools that creates unique, ingenious work. Putting a 10 out of 10 for Photoshop on your resumé has little meaning of how you employ your ideas.

But still, designers complain about their tools, and people blame designers for transferring that blame. A good example is Microsoft PowerPoint. Can you think of any bad presentation slides? Chances are you’ve seen more ugly ones than good ones. People might scoff and think it there was no design intent–the presenter carelessly assembled it. Or perhaps, it was actually a bad designer… Both could be the case.The quick rebuttal is that one should know how the tool works, and adjust the approach to improve the workflow. This is pretty evident by beautiful presentations made in PowerPoint. So yes, we can blame designers. But not always.

Folks might say the tool is bad. I can empathize. My mental model doesn’t always align itself with the interactions in plenty of software I use, or the things I see. Sometimes the tool isn’t efficient, or it wasn’t intended to do the new things we conceive.

Think about a logo. Let’s say that a newly proclaimed graphic designer dives into Microsoft word to make a blazing hot logo destined to be laser-etched into 3 million belt buckles. Specifically, he spends 4 hours fiddling with WordArt from 1997 until the dissolved gradient wrapped in Comic Sans feels just right. If you can imagine the result, it might end up looking something like this:

sorry for scortching your eyeballs

This fictional designer just didn’t have the creativity to design a top-notch brand identity (unless the demographic was 11-year-olds who traveled to the future from 1997 in search of gaudy belt buckles). And it’s his fault. Even if he was commanded to use only Word, he could have tried to layer text within text boxes to get a unique letter arrangement and mixed a bit of Wingdings dingbat to make an assisted readymade logo. That sounds like a pain though.

Or he could have used Illustrator, Photoshop, an open source tool, or even just pen and paper. Sure, Microsoft Word can make logos, but it might not be the correct tool for a timely, high quality result. There may be no best tool, because the intent and context can vary. We can be upset when tools aren’t able to do what is expected of it. We can also suggest improvements or replacements to frustrating software, or build our own.

Back to PowerPoint– it can create good presentations, and I would rate it as adequate, with room for improvement. I haven’t needed to use Powerpoint extensively for a long while, but I wouldn’t be surprised if the current interface could benefit from better defaults and features. I personally found Keynote for Mac easier to use.

Before you bash your designer, realize they are the ones finding the weaknesses and limits of these tools, and hopefully they are also suggesting improvements for them (after all, designers design tools too). And designers–before you bash your tool, think about your intent and whether it works toward your goal. If you are locked into the software, do the best with what you have. Sometimes a shoe makes an okay hammer.

Why I gave up to succeed

Recently, I challenged myself to be my own WordPress developer in order to get my site relaunched. Sure, I keep up with HTML, CSS, and know my way around a little PHP if I can pick things apart in existing code. But I’m a designer at heart and have no certificate of WordPress mastery. After unsucessfully arm wrestling my code editor to solve a seemingly easy code issue, I decided to use Bountify to help with a solution. I had to let go of my isolation so I could learn.

I took it upon myself in the recent redesign of my website to optimize my site for the best interactive experience (i.e., optimized for people), to be device agnostic, and get my hands dirty with design and code. I wanted to do things from scratch without any help. I planned for the information architecture, the layout, and visual theme. I learned the proper techniques for creating a child theme (which took longer than I anticipated), found the php functions that needed changing, and determined what I had to do to transform my pencil sketches into a real website and blog. I love the challenge of problem solving, but there comes a point when the payoff of learning or troubleshooting something beyond my skillset becomes a complete waste of time, especially if it won’t serve me in the future.

After getting all the site templates created, it came time to sort out all the bugs I had created as a novice theme developer. I did well searching Stack Exchange and WordPress forums for most of my answers, and felt like I had a handle on editing things to suit my new theme. But I had one issue that I could not solve because it involved several interrelated modifications that seemed over my head. Each time I tried something, it broke something else. I looked high and low but nothing did the trick. So I gave up. I gave up on doing things alone without personal assistance.

When an anonymous user supplied some code that worked without me having to struggle through it, the compounding hours I spend on the one issue all seemed worthless. In my book, that is success. Not that I can do things all by myself, but that I can rely others’ knowledge and assistance to fix an issue that is easy because of their background.

Being my own devil’s advocate, a downside to letting someone else do things is that you may have a barrier for solving future issues that were caused by the code changes. If it remains foreign to you, you won’t know why it affected something else. So knowing why others do things can also be a big help. In my particular case, I was using several different snippets of modified code I had collected from disparate sources which caused pagination to get messed up, and I had to analyze what was going on in order to search for a relevant query.

How to Make an Updatable Portfolio Book

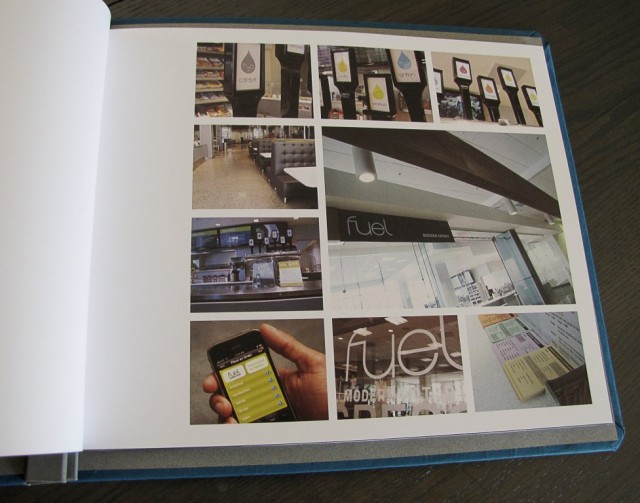
In tandem with my interest in reusing-on-the-cheap, I built a graphic design portfolio using thrift store materials, a cut of fabric, and some art supplies lying around the house. Plastic sleeves seem tacky to me and remind me of family photo albums, so I wanted my work  to stand on its own on quality matte paper. Instead of paying $300+ for a cookie-cutter book portfolio or getting a bland Itoya Art Presentation books, I decided to make a book with interchangable pages. Screw and Post binding is great for updating, and it’s also the method used in most scrapbooks and older photo albums so it’s easy to find at a thrift store. You can learn how to make one.

Materials:

  • An old-fashioned screw-post photo album (you could also use a scrapbook; just choose a size you want to work with)
  • Satin fabric (any non-stretchy, sturdy fabric will do)
  • Fusible interfacing (Stitch Witchery worked for me)
  • Screw and Post binding, or grommets (you can reuse the ones that come with your book if your pages fit the same thickness, otherwise buy from a printshop)
  • Paper/page printouts

Tools:

  • Cutting mat, preferably larger than your book size
  • Ruler (I prefer cork-bottom ones to keep things still)
  • Xacto knife
  • Single hole punch, or adjustable 2-3 hole punch
  • Paintbrush, and disposable cup or container
  • PVA glue or other archival bonding glue, or
  • Photo or Spray Mount (I had leftover Super 77)

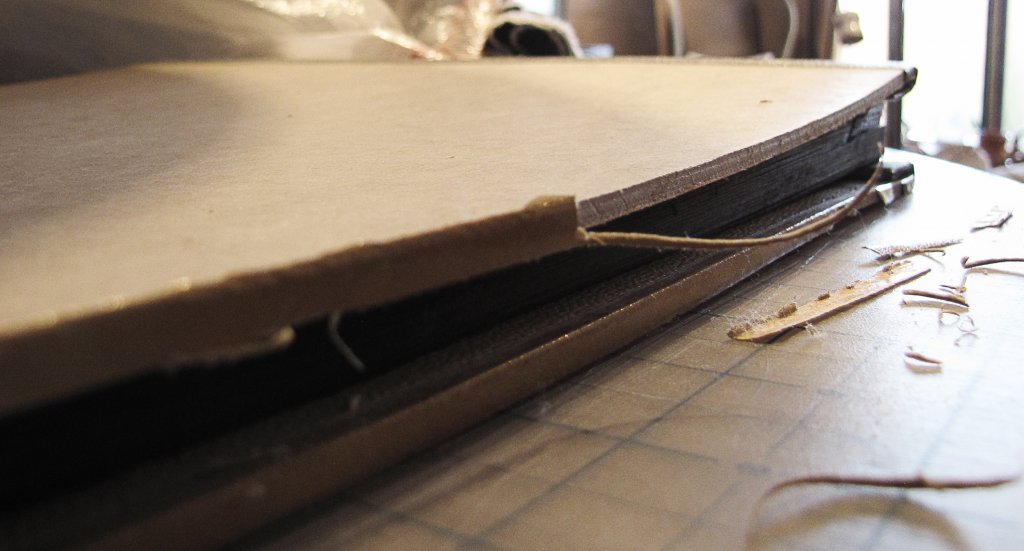
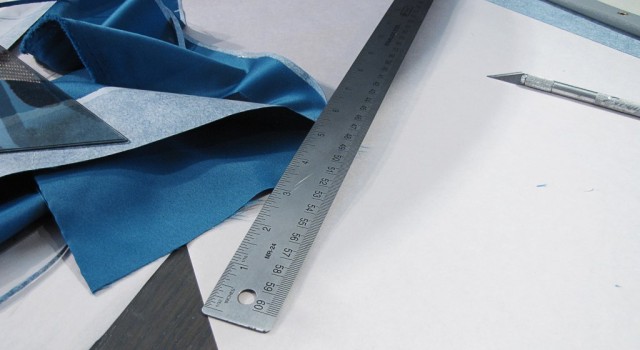
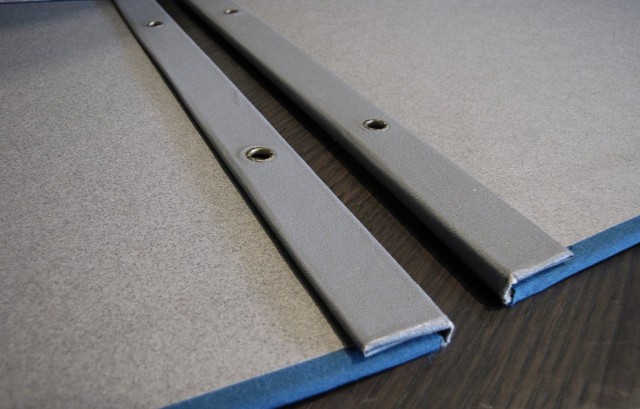
So to start, remove the inserts from your book so you can get at the outer covers. Usually they are made out of leather, plastic, or some cover-paper. In my case, the cover looked like gaudy gloss cardboard. I summoned my knife to make a dissection at the edge to start removing it from the book board that we’ll work from. Just rip as much as you can, then you can trim the rest to make it flush with the bookboard.

Leave the book tape/spine mesh unless you want to use your own tape. Mine is a bit weathered on the corners, but it was the neutral color I was looking for.

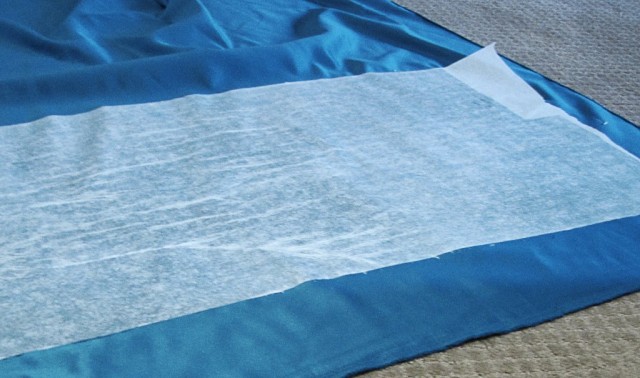
I then prepared my cloth for a stiff life as the cover. I followed the directions using enough of the Stitch Witchery interfacing to cover both front and back boards with some room to wrap into the inside by an inch. I also did some pre-test with the scraps to see if the cloth would hold up without the interfacing. However, the PVA glue bled through the porous surface leaving an uneven finish with darker stains (even though PVA dries clear).

Do all your trimmings. Give an inch or more on 3 sides to make the folds. There’s no need to cover the binding edge unless that is what you have in mind. At the corners, trim a 45º cut so when you fold each side the corner doesn’t bunch.

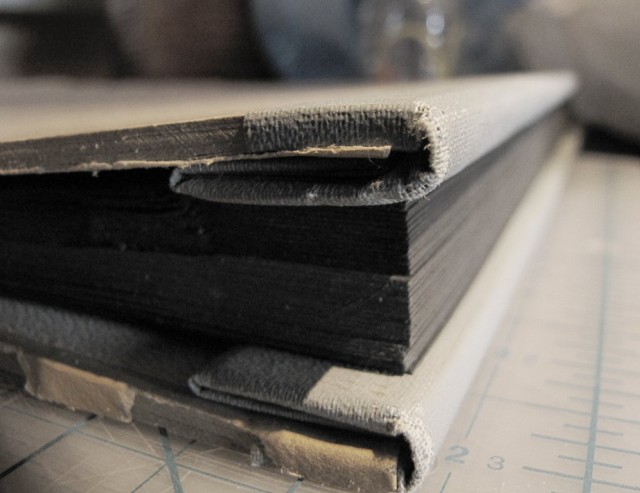
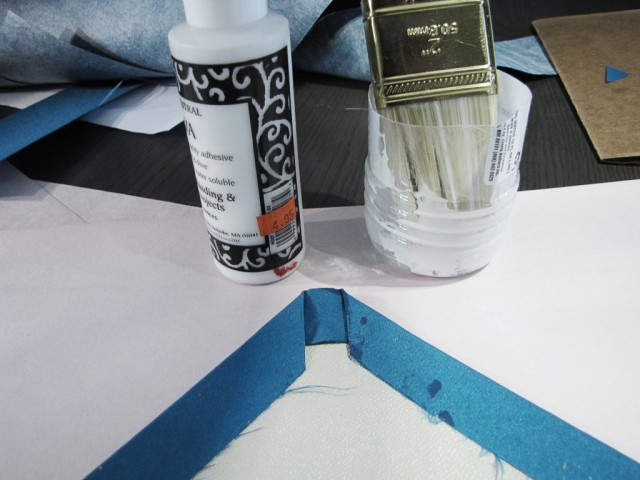
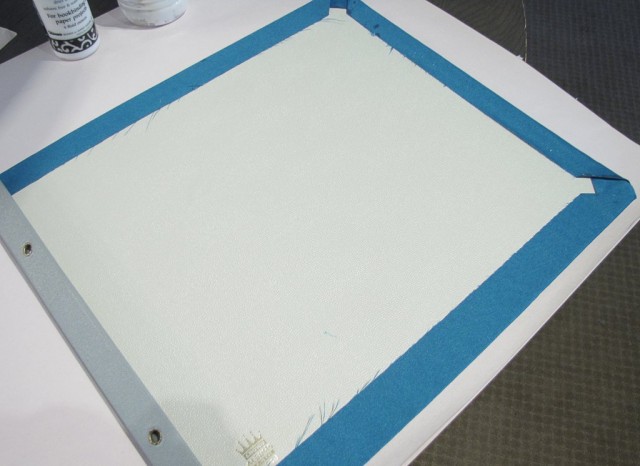
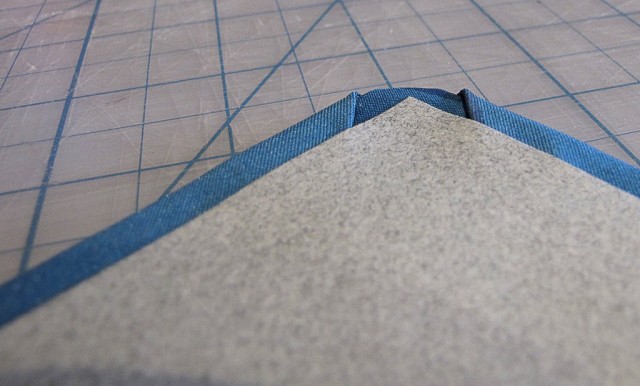
Apply straight glue to the book board that would show on the outside. Use thin layers and dilute with water if the application is too thick. Position the board to line up with your fabric and press down evenly (you can use a silkscreen squeegie, posterboard, or cardboard). If your fabric is thick (which it should be with the interfacing), score the edges so you can fold it over easily without bubbling. Finish gluing your edges down by applying glue to the fabric this time. Since my original photo-book had rounded edges, I had to make a 45º fold at the corner, then make the normal right angle folds.

Repeat for the backside of the book cover. Don’t worry about fraying or wet glue drops that seep on the inside as they will be covered by what are called endpapers. Use your favorite bookmaking endpapers,  opaque paper, or more fabric. Cut it to the size of the interior pages, or about a quarter-inch less than the size of the bookboard on the three sides, excluding the book spine. Then spray mount it (or glue if you know it won’t bleed through).

My end-papers matched the existing flaps, and distinguished the inside from the outside. Now all you need is to print pages or mount your images to the pages that came with your scrapbook/presentation book. Finish off by punching holes in the correct locations. Then you can bind it up using the screw and post, or binding studs from a hardware store. Add any final touches, such as a stamp, sticker, screenprint, or name plate for the cover.

Living in an “iPad” Architecture

This is a stunning concept design for a jumbo iPad-like interface at home. iPad is the first of the touchscreens or tablet computing, but the technology is pretty awesome. Don’t expect to get this in your home without a barrel of money–think expensive, but possible (not a science-fiction gimmick) and functional for the enhanced living-place or workplace.

Multi-touch interactive media has been around for some time, but hasn’t been realized in the commonplace home. Perhaps we will see these next holiday season replacing standard televisions. I dream of a day when remote-system touchscreens take augmented reality technology and give living things and the home environment an positive upgrade. It’s quite a wonderful mashup of science and design.

Imagine how this innovation can translate to jobs, design, and life. Although this next video is a projection, if it were a screen, it would behave like a jumbo iPad with infinite styli (plural of stylus pen) for collective control. This would render Wacom drawing tablets obsolete, as retro ephemera. A graphic designer like me would love to have a giant surface like this to draw on.

Now if only we could cure diseases with iPads and the like.